Here are my steps to install Klipper on a Raspberry Pi:
- Follow these instructions https://github.com/dw-0/kiauh
- From the KIAUH main menu, install klipper, moonraker and mainsail (even if you do not need 3 instances of klipper to manage 3 printers from a single raspberry pi respond “3” when the installation requests it).
- check that mailsail loads by browsing to the IP address of the raspberry pi.
Next steps are specific to Kobra 2
- Compile firmware or download it and ignore this point
Connect to the raspberry pi by SSH using an ssh client such as Putty.
IP address of your raspberry pi
user: pi, password: raspbian
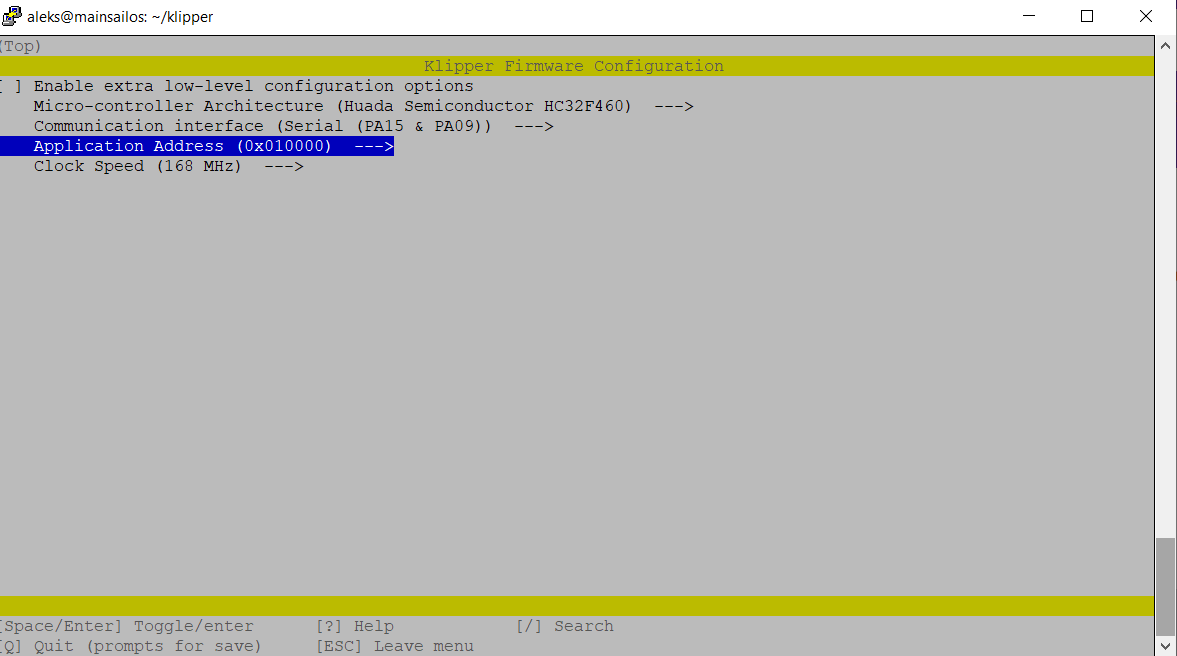
cd klippermake menuconfigset up the menu as in the picture and exit and save with Q
makeDownload the resulting firmware from klipper/out/klipper.bin with WinSCP (connect to the Raspberry Pi using the same login and password that we used to connect via SSH)
- Rename klipper.bin to firmware.bin and copy it to the root of an SD card, with the printer turned off, insert the SD card and turn it on, in a few seconds the klipper firmware will be loaded. From this moment on, the printer screen will be unusable.
- Add udev rules:
Edit the /etc/udev/rules.d/10-usb-serial.rules file
with sudo nano /etc/udev/rules.d/10-usb-serial.rules to contain:
SUBSYSTEM=="tty", ATTRS{idProduct}=="7523", ATTRS{idVendor}=="1a86", SYMLINK+="ttyUSB_KOBRA2"Ctrl+X to exit and save
Edit the /etc/udev/rules.d/98-klipper.rules file
with sudo nano /etc/udev/rules.d/98-klipper.rules to contain:
SUBSYSTEM=="usb", ATTRS{idVendor}=="1a86", ATTRS{idProduct}=="7523", ACTION=="add", RUN+="/bin/sh -c '/bin/echo RESTART > /home/pi/printer_1_data/comms/klippy.serial'"Ctrl+X to exit and save
- Restart the operating system:
sudo reboot
- Download, extract and drag and drop the four
cfgfiles into the MACHINE section of the mainsail
- Click on “FIRMWARE RESTART” in mailsail.
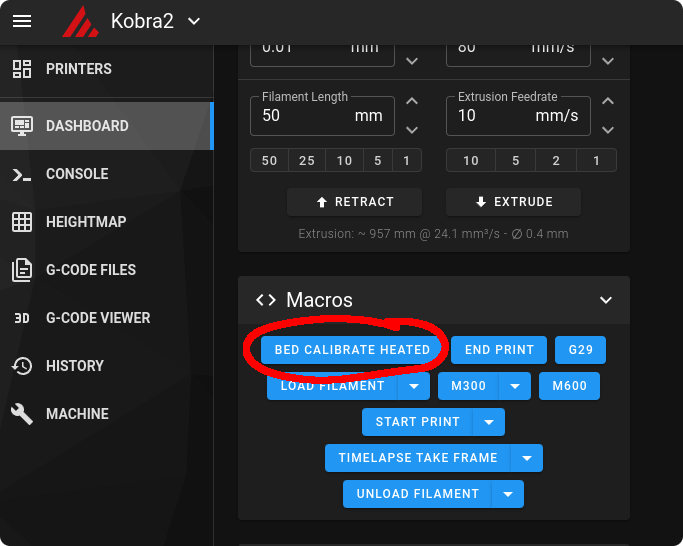
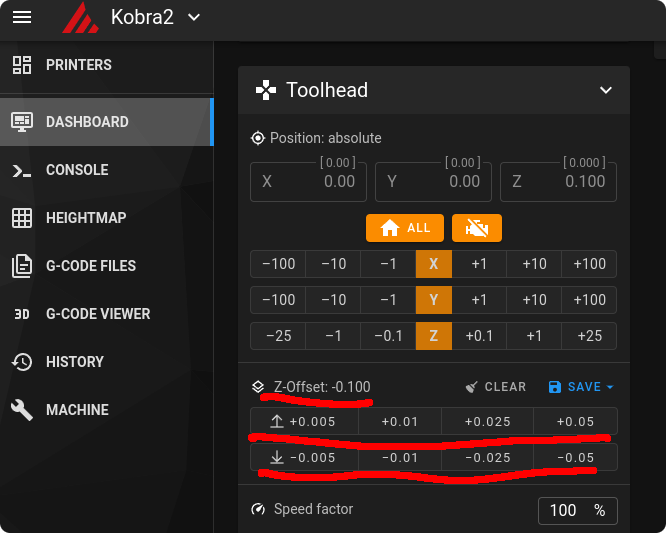
- Bed Leveling and setting Nozzle Offset.
Do Home and move Z to 0, use Z-Offset to raise or lower the nozzle, use a paper as usual.
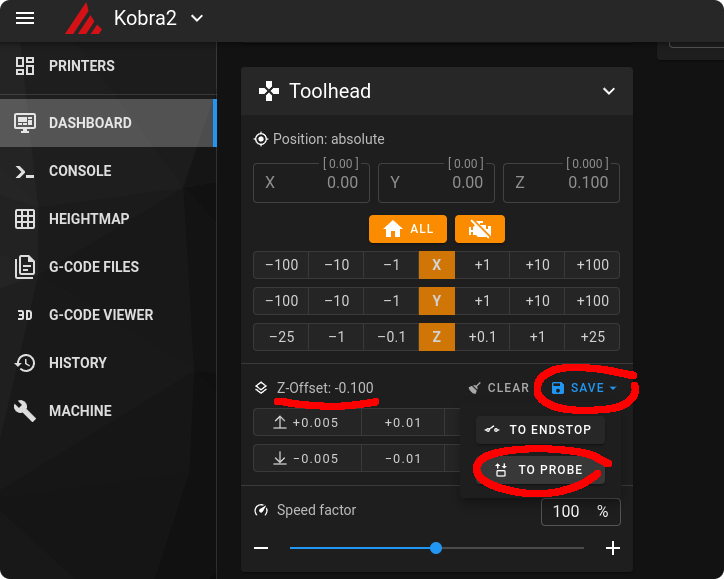
Once Z-Offset is calibrate, click on SAVE > TO PROBE and SAVE_CONFIG
With the new configuration (02-01-2024) the z offset value is stored between sessions so it is not necessary to save it, if you save it when restarting it would be applying double, so if you save it the z offset value after restarting you should set it to zero for the session.
this step is no longer necessary
- Remove the SD card from the printer, to prevent the firmware from loading every time you turn it on.
- That’s all! Your printer is set up and ready to print.
Bonus
Cura profile I use (I no longer use Cura)
Start gcode cura:
START_PRINT EXTRUDER_TEMP={material_print_temperature_layer_0} BED_TEMP={material_bed_temperature_layer_0}Start gcode prusa slicer:
START_PRINT EXTRUDER_TEMP=[first_layer_temperature] BED_TEMP=[first_layer_bed_temperature]end gcode:
END_PRINTExcluding objects
Add these lines in the moonraker.conf file in the mainsail machines section to allow excluding objects while a print is in progress.
[file_manager]
queue_gcode_uploads: False
enable_object_processing: True
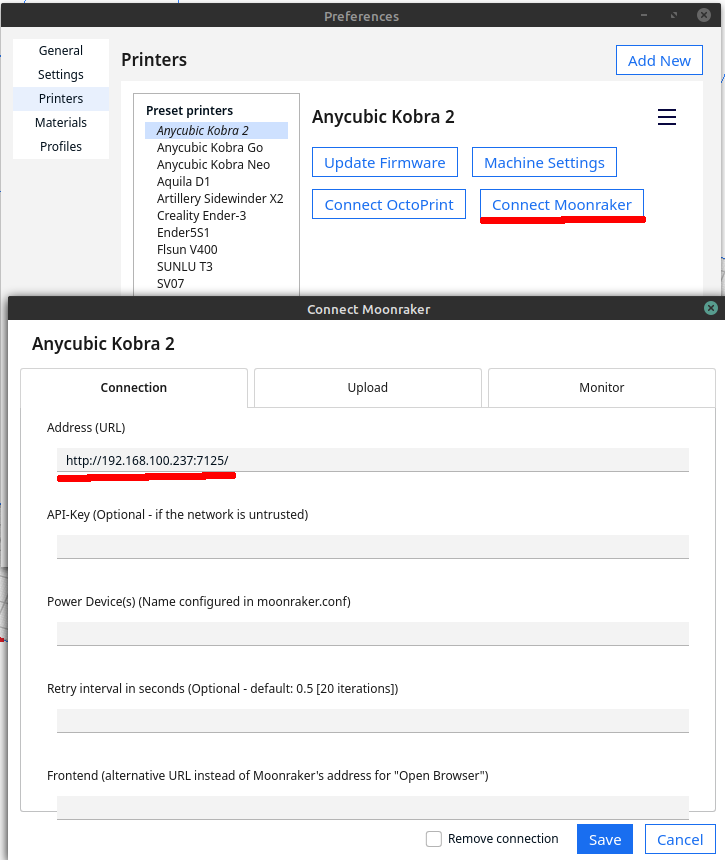
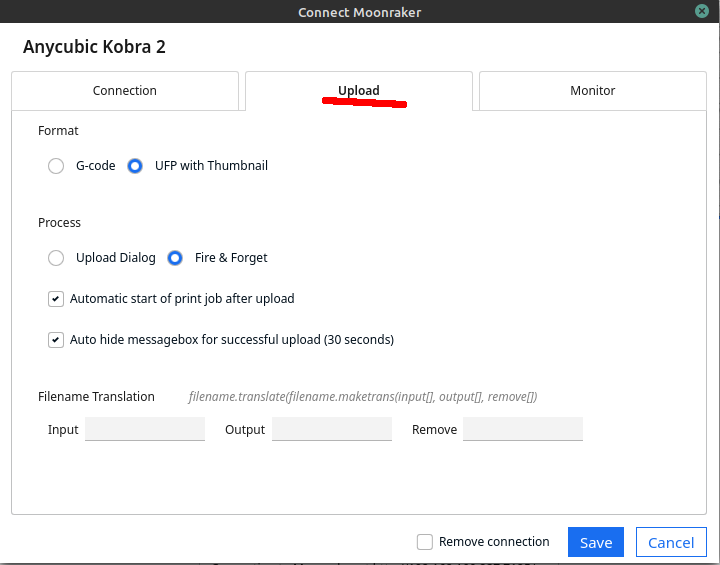
Send prints from Cura
Install the plugin Moonraker connection from the Marketplace in Cura
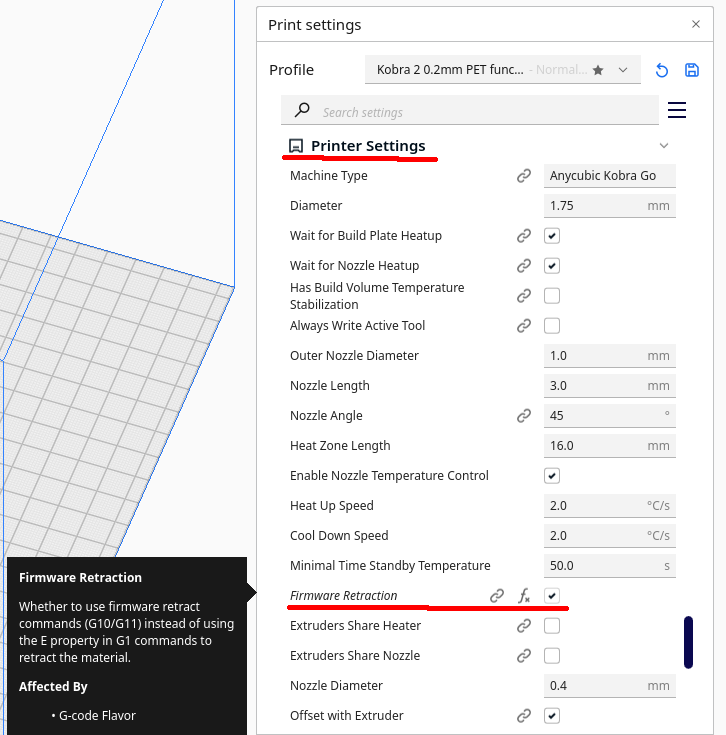
Firmware retraction
Install the plugin Printer Settings from the Marketplace in Cura
If you have any questions or comments you can leave them in the comments section of this video Klipper firmware on the Kobra 2